This article contains tips on how to care for your plants in order to maintain their natural beauty and allow them to flourish. By following the simple advice presented herein, you can provide your beloved plants with the necessary nurturing and attention that they require to bloom and bring joy to your senses.
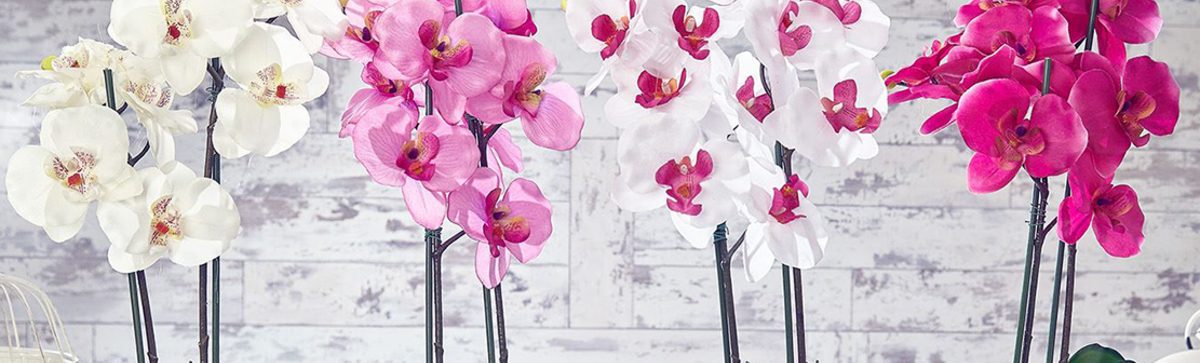
Upon laying our eyes on the exquisite sight of an orchid, one cannot help but surmise that this particular flower exudes an aura of caprice and demands high maintenance. Yet, upon further scrutiny of its natural habitat, one would come to the realization that this is far from the truth. It is a versatile plant, thriving not just on soil, but also on rocks, trees, and even water. While it is true that certain tropical plant species may prove challenging to cultivate indoors, popular orchid varieties, such as Phalaenopsis and Dendrobium, can indeed flourish within the confines of one’s own home.
With proper care, your orchid will thrive in your home for years to come.
Orchids, known for their exotic and striking beauty, are among the most popular houseplants in the world. Caring for your newly acquired orchid can be a bit of a challenge, but it is rewarding once you get the hang of it. When it comes to taking care of your orchid after purchase, you need to ensure that you provide the right conditions and environment for it to thrive.
Orchids require bright, indirect light and a warm, humid environment. You can ensure that your orchid is in the right conditions by placing it near a south or east-facing window and misting it frequently.
Orchids grow best in well-draining soil that allows air to circulate around the roots. Make sure to avoid overwatering as this can cause root rot that will eventually kill the plant. Water the orchid only when the soil begins to dry out, and fertilize it with a balanced fertilizer every three weeks. So, to care for your orchid after purchase, inspect it for damage or disease, provide ideal lighting and humidity conditions, use well-draining soil and do not overwater it.

Taking care of a tropical flower
It’s important to ensure that their environment stays within a certain range of humidity – around 50-80% is ideal. One way to make sure that they get enough moisture is by spraying them, but it’s important to be careful about how you do it. When you’re misting your orchids, try to get the water onto the leaves from below rather than from above. This will help prevent any water droplets from collecting on the delicate inflorescences or on the places where the leaves meet the stem, where they could cause damage. Some florists suggest using a damp towel to cover the flowers and keep them hydrated if the air in your home or greenhouse is particularly dry. Whatever method you choose, it’s important to remember that these tropical beauties thrive in environments with plenty of humidity – so don’t hesitate to give them a little extra moisture when they need it.
It has been observed that plants thrive exuberantly when placed in balconies or loggias. It is imperative that the soil has an adequate drainage system in place, and one of the most effective ways to achieve this is by incorporating pebbles into the soil composition. By doing so, the chances of root rot occurring are significantly minimized, ensuring the health and optimal growth of the plant.
The crucial role of watering in providing essential nutrients to a flower cannot be overstated, as the overall wellbeing of a plant is heavily reliant on its ability to absorb water. Nevertheless, the amount of water required by an orchid cannot be readily quantified, owing to the varying size of individual flowers. Referencing the advancements made in irrigation technology, however, offers an effective means of ascertaining the optimal amount of water necessary for your orchid’s growth and sustenance.
To provide the perfect amount of moisture for your potted plant, consider placing the pot inside a basin or larger planter filled with room temperature water that has been allowed to settle. Use a watering can to pour the water directly into the container, taking care to stop once the liquid level reaches approximately one-third of the container’s capacity. This amount is ideal for enabling the soil to absorb the right amount of moisture without becoming too damp, which can damage the roots of your plant. Be mindful not to pour excess water, as this can cause more harm than good.
To sufficiently saturate the orchid, it should be soaked in water for a duration of 15-20 minutes. Vigilantly monitor the emerging roots as they slowly uptake the liquid; their color transitioning to a vibrant green is an indicator of ample moisture absorption. This notion highlights the importance of utilizing translucent containers for orchid cultivation, allowing for easier observation, while also accenting the plant’s inherent beauty with the inclusion of opaque vessels.
After taking out the pot, it is recommended to allow it sufficient time to drain off any excess moisture – this process may consume a considerable amount of time, stretching up to an hour. Particularly in the winter season, there is a chance that chilly gusts of winds may infiltrate through crevices in the windows, leading to undesirable outcomes. Due to this, it is highly advisable to let the flowers dry out for the entire night to avoid freezing of the damp roots.
It is important to exercise a degree of caution when watering your plant. Overwatering can have adverse effects, causing the plant to rot. Despite their affinity for moisture, orchids are used to self-regulating their water intake in the wild. They absorb only what they require while allowing the excess to trickle down into the soil.
Inadequate watering can be detrimental to the growth and health of orchids. You may observe a yellowing of the leaves, which indicates that your plant is facing an issue with moisture levels. This yellowing can be caused by two primary factors: over-watering or under-watering. Over-watering occurs when the orchid is exposed to excessive moisture, leading to root rot. In such a situation, the best remedy is to transplant the orchid, taking care to trim off any roots that have begun to decay by using a sharp knife.
To alter the moistening process, make adjustments to the watering mode or amount. You have the option of increasing the quantity of water or prolonging the duration of the watering session in the second phase.
It’s important to remember that the advice concerning yellow leaves only pertains to newly grown foliage. In the event that the greenery closer to the roots begins to wilt, it may be time to revitalize the plant. To address the issue of a withered leaf, it’s best to wait until it’s fully dried before removing it from the plant.
Orchids cannot be subjected to universal watering rules as the frequency of watering must be dictated by the individual conditions of its cultivation. It’s quite possible that two orchids residing in the same apartment would require watering at different frequencies depending on the positioning of their windows. This highlights the importance of understanding the unique needs of each orchid when it comes to their watering schedules.
In order to properly determine the frequency at which your recently acquired orchid should be watered, we suggest that you take the time to meticulously monitor its condition. As previously mentioned, if the roots appear to be fully saturated with water, they will exhibit a vibrant green hue. Additionally, you may notice that there is a considerable amount of moisture present within the soil of the plant and that the walls of its container have become coated with a thin layer of condensation. Keeping all of these factors in mind will assist you in providing your orchid with the appropriate amount of water needed to maintain its health and vitality.
It is not necessary to hold off on watering your blooming orchid until the entire root system has fully dried. Simply water the plant once the roots become mostly silvery gray and there is minimal remaining condensation. You know, if you wait for the roots to completely dry out before watering, your orchid may cease to produce lovely blooms.
In order to promote blooming, it is wise to exercise patience when faced with a non-blooming plant. Allow the substrate, roots and condensation to dry out completely before taking any further action. One useful way to determine if the plant is ready for its next watering is by feeling the weight of the pot. When the pot feels light and less heavy than it was after its last watering, it is a sure sign that the time has come to water your plant.
When it comes to tropical plants, it’s crucial to understand their watering needs. By giving them proper attention, you’ll soon realize how thirsty they can get. However, it’s essential to keep in mind that orchids prefer dryness over excessive moisture. In fact, drowning them can have harmful effects on their growth and overall health. Therefore, it’s essential to strike a balance and cater to their needs accordingly.
The main advice that can be given is: it is better not to water than to pour too much water, it is necessary to create humid air and ensure that there are no drafts.